When we finally get to visit Switzerland, I am going to be an expert on their public transportation. At this point, I think I may know more about it than the locals! And to prove it to you (and myself!), here is a quick guide on how to purchase public transportation tickets with the SBB app when traveling in Switzerland.
What is the SBB App?
SBB stands for Schweizerischen Bundesbahnen, which translates to Swiss Federal Railways. SBB runs all the major trains in Switzerland, therefore their app is the easiest way to purchase train tickets in Switzerland. For example you can even purchase tickets for trams, buses, and boats in certain cities such as Zurich!
Transporation can be a little confusing in some Swiss cities, so it’s good to have an app that determines exactly what type of ticket you need to get from point A to point B. Plus it can save time when you don’t need to go out of your way to purchase your ticket from a ticket machine.
While the app itself is actually pretty user friendly, I still wanted to write a guide that goes through the process step by step – with pictures!
Using the SBB App
- Download the free SBB App from the app store.
- For ease of use, you’ll want to create a SwissPass account. You can’t purchase tickets through the app without an account, so I recommend setting this up before you travel. This is also free!
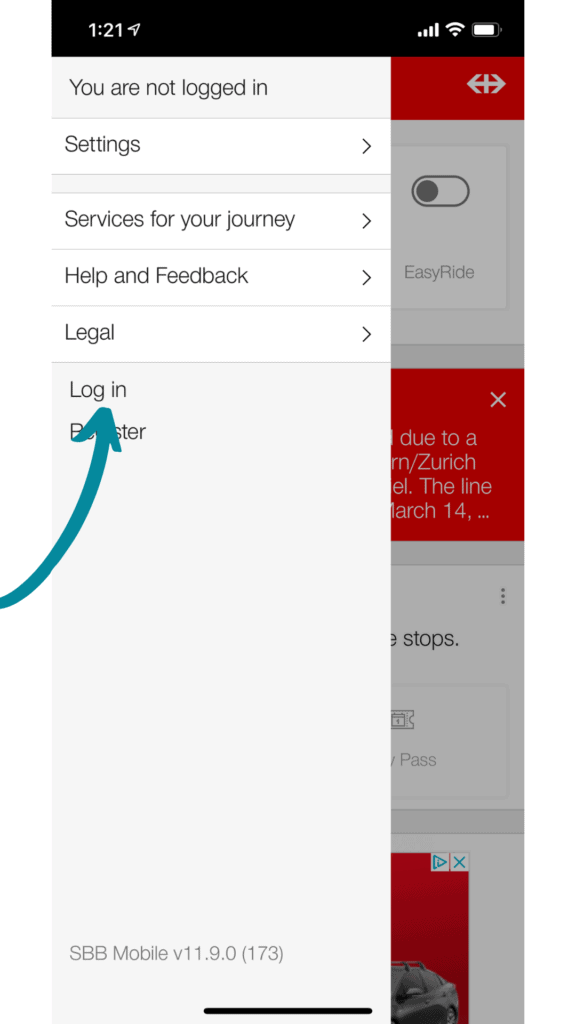
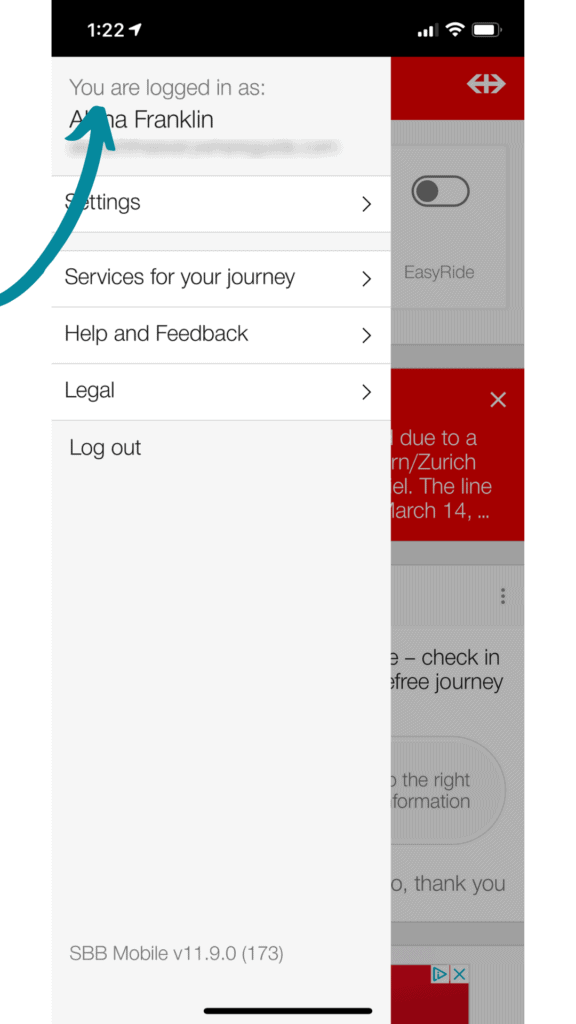
- Open the SBB app. Log in from the side menu. Once you’re logged in, the app will keep track of you, your travel passes, and other travelers on your account.
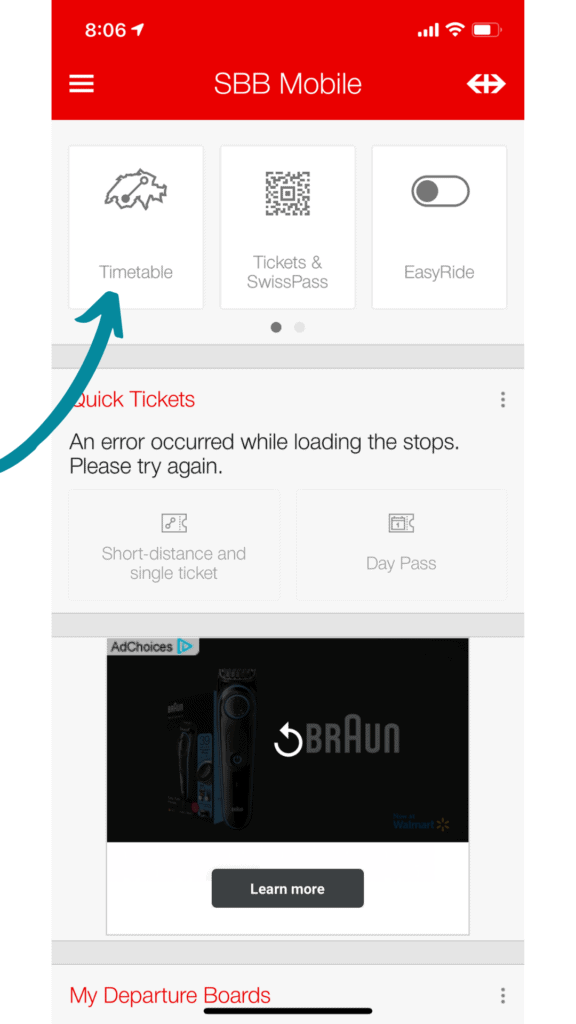
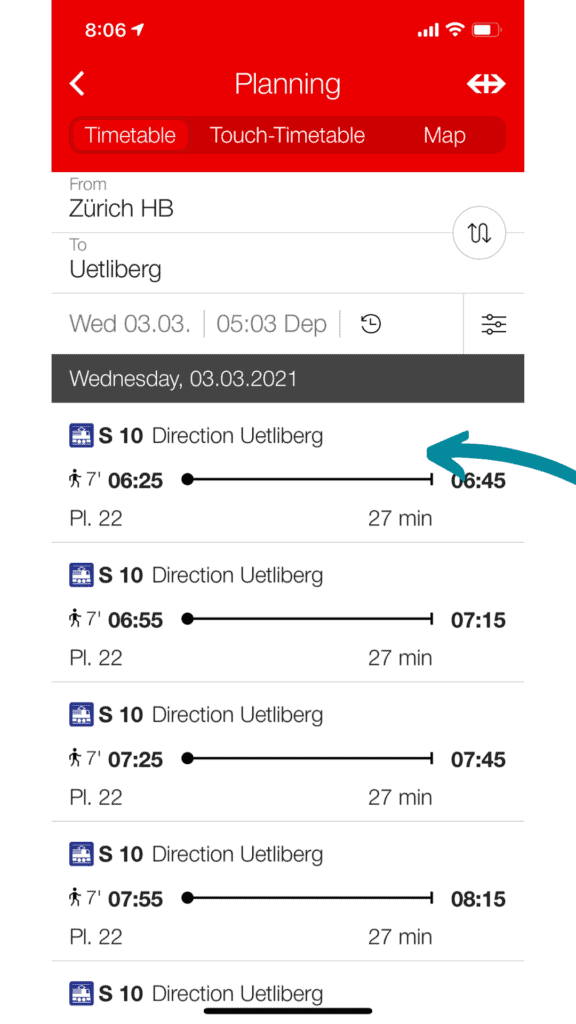
- After you’re logged in, then return to the main screen and select Timetable. Enter your From and To stations to view a list of possible routes. Additionally, you can select a particular time if you’re looking to purchase a ticket for the future.
- Once your route information is entered then you will see a list of potential routes. Find a good time option for you and select that route.
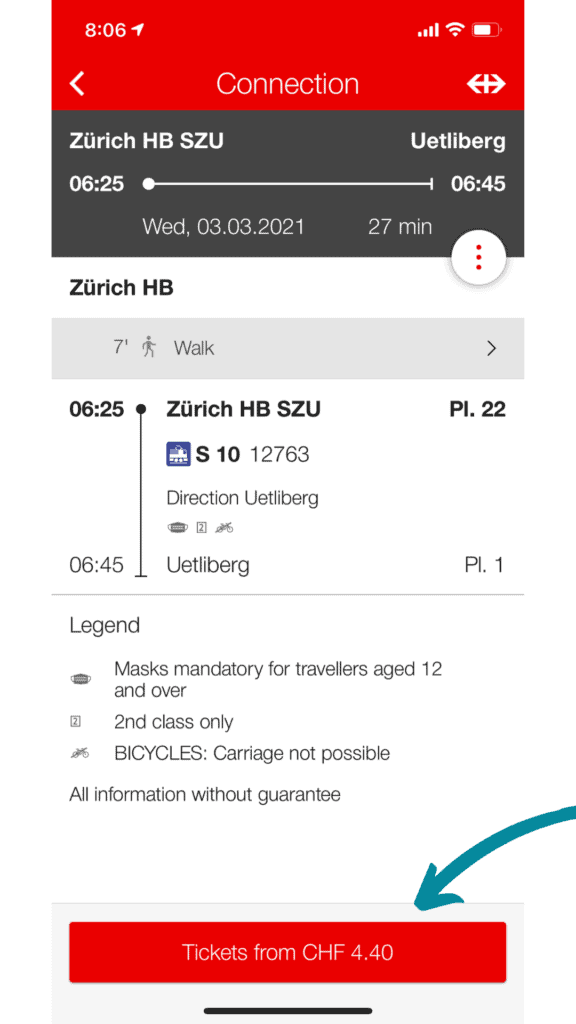
- You’ll be taken to a closeup view of your route containing a bit more information about your route, including platforms, and any special indications. Remember, your ticket validity period will be based off of the ticket time, so make sure you’re not buying a ticket for before you intend to travel.
- If it’s your first time logging in then the app may ask you to confirm if you have a half-fare card. You would know if you do, so if you don’t, go ahead and select no.
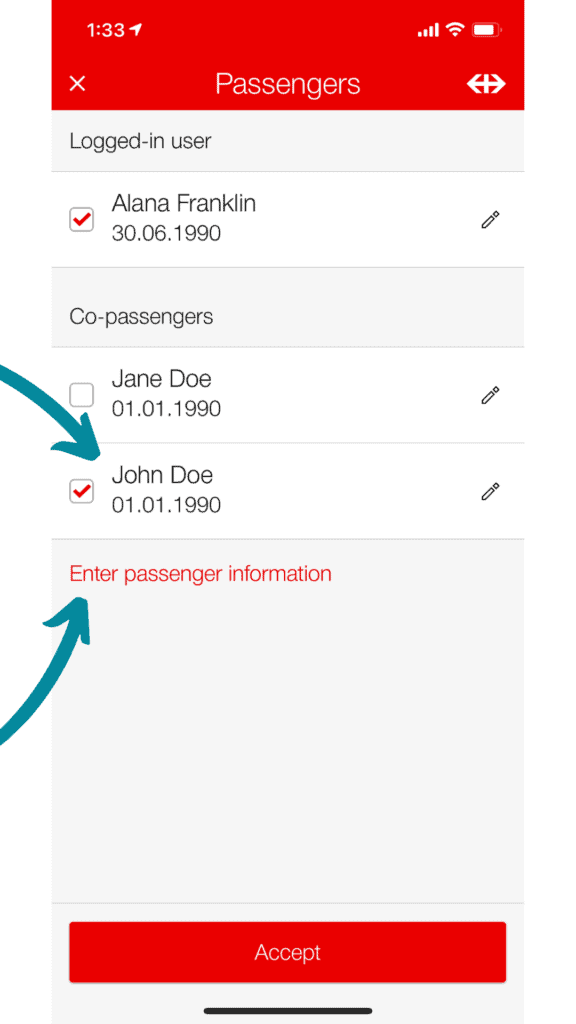
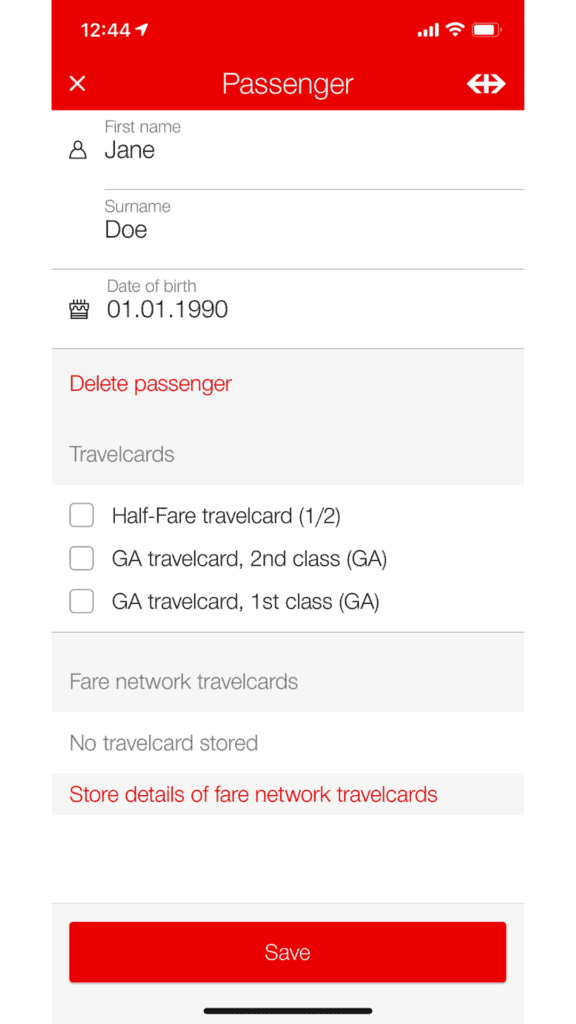
- The next screen allows you to edit how many passengers you’re purchasing tickets for. Your information should already be listed, but if you’re traveling with anyone else, you will need to add them too. Once you add a passenger, their information will be saved for the future.
- To add a passenger, select “Edit Passengers”. From this screen you can add a previously added passenger, or select “Enter passenger information” to add a new passenger”. Once you’ve selected all your passengers you can press “Accept”
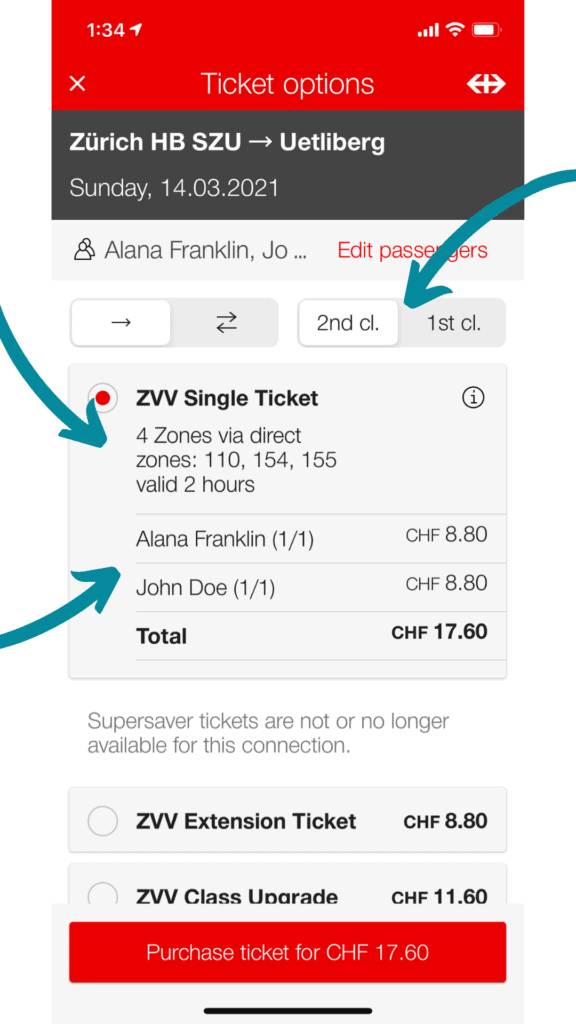
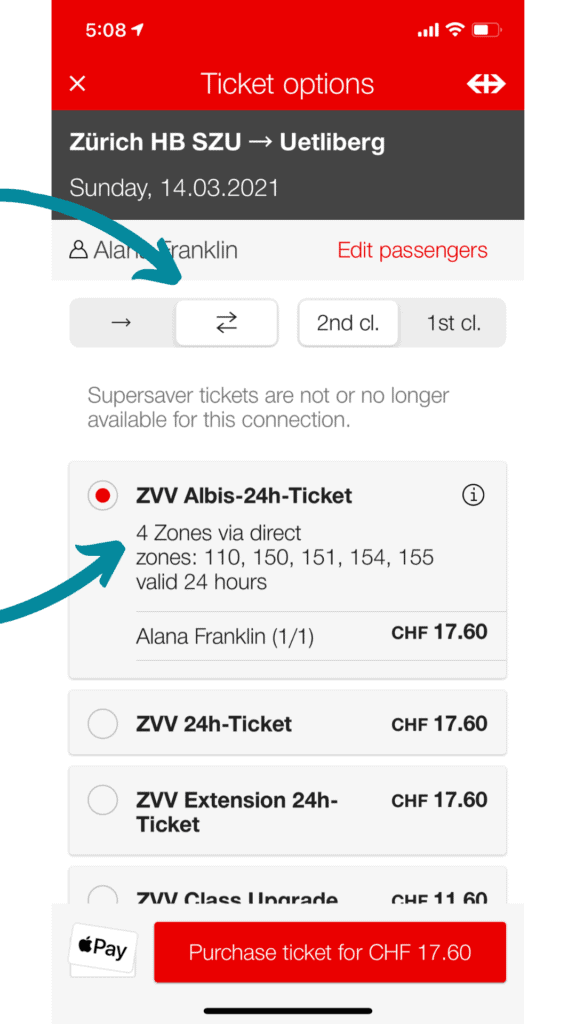
- After your passengers are confirmed then you can view accurate pricing information for the difference ticket options. The app is smart enough to know that I need a single ticket for 4-zones to get to my destination which has a default validity period of 2 hours.
- Alternatively, you can select the round-trip button at the top of the screen which as a result causes the app to list the Albis 24 hour ticket, a special 24-hour ticket that gives me 6 zones for the price of 4. It also lists the standard 24-hour ticket with zone extensions for the 4 zones required for this trip.
- Almost done! Now that I know which ticket I’m purchasing, I do a final confirmation of the ticket, passengers, and class. Then press the purchase button at the bottom of the screen.
- Since I’m on an iPhone, it asks me to pay via Apple Pay. Confirm your payment, and you’re done! It’s that easy! You will receive a confirmation and will be able to access the ticket from the app home page.
**Featured image by Tomek Baginski


